Know React and Want to Learn React Native? Here's Where to Begin
Know React and want to learn React Native? There are many tutorials out there, but none encapsulated all the questions I encountered. Here's where to start.

There are many React Native tutorials out there, but none encapsulated all the questions I encountered once I entered the realm of mobile development:
- How to get past Expo bugs?
- How do I style my components?
- What about state management?
- How do I troubleshoot my own code?
- What about navigation?
Some sections of this guide will serve as an overview and will simply provide an explanation of certain tools and direct you to additional resources. Other sections will go deeper into the how-to, with screenshots, GIFs, and code examples to ensure you can continue your journey into mobile development, no matter what error is thrown your way.
As the title suggests, this post is intended for individuals who are already comfortable with React and are interested in traversing the bridge to React Native. If you find yourself lost at any point, I invite you to read up on React documentation to aid in your understanding!
For getting up and running, this tutorial will be framed through the lens of common toolchains to bootstrap your application, free from the Webpack hassle.
Create-React-App (CRA) for React
Set up: nodeJS, npm or yarn, CRA.
Expo/Xcode/Simulator for React Native
Set up: nodeJS, npm or yarn, Xcode, Expo, Simulator.
I used yarn as it was conceived of and built as a better replacement for npm, and some consider it better for pinning versions than npm is. The main difference here in the developer experience is yarn add [package-name] instead of npm install, and the version numbers are stored in yarn.lock rather than package-lock.json. Go figure.
Xcode
Xcode is an IDE for macOS. It is the only officially-supported tool for creating and publishing apps to Apple's app store.
Expo
Expo is an open-source platform for making universal native apps for Android, iOS, and the web with JavaScript and React.
Simulator
The Apple iOS Simulator, which ships as part of Xcode, is a tool for developing and prototyping your mobile app. This is crucial for seeing your work come to life, and hot reloading. You can read more once you've installed XCode by opening Simulator -> Help -> Simulator Help. Through the Simulator you can:
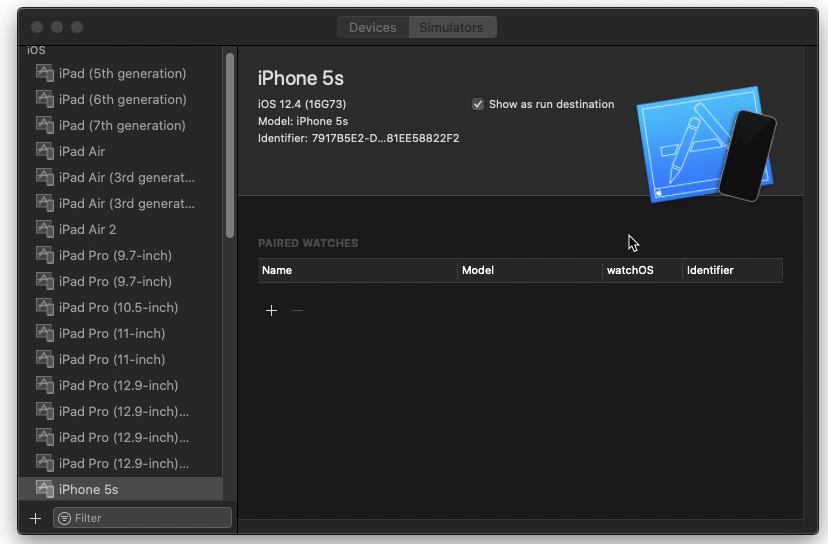
- Choose your devices. If you don't see the device you'd like to test on in the Hardware -> Devices dropdown, you may have to install an additional operating system. This can be done by selecting Manage Devices in Hardware -> Devices. XCode will open and you should select Simulators. In the bottom left corner, click the plus sign, and add the device/OS of your choosing.
- Refresh your app. Where to go if you reach a known bug of yours while working on a different component and simply want to continue? Hardware -> Shake Gesture in the menu, and then Refresh in the in-app Developer Menu itself.
Troubleshooting set-up
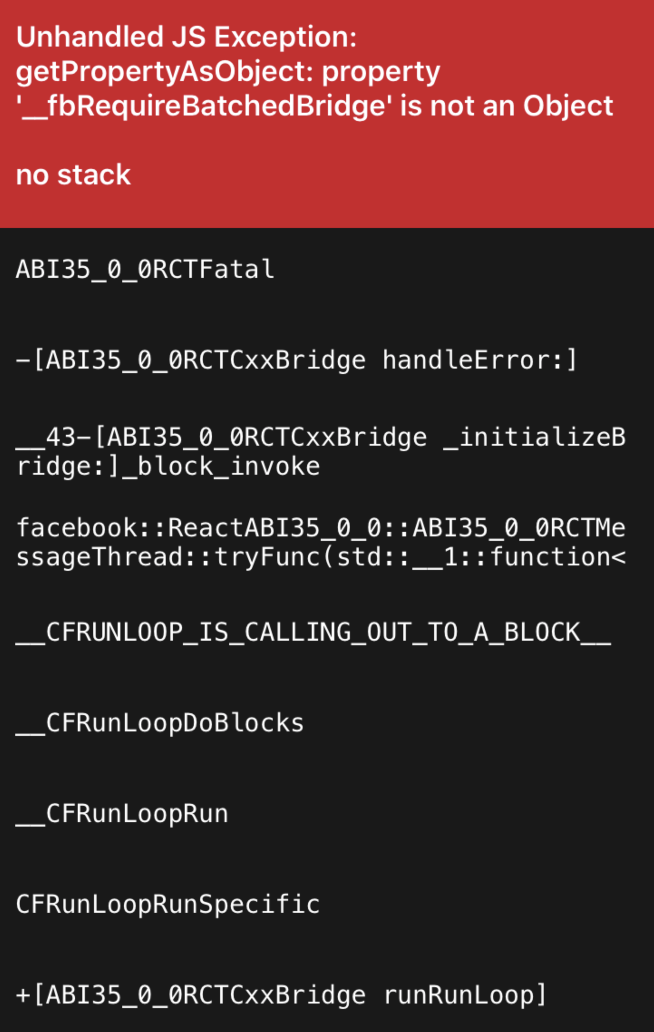
I ran into issues when yarn start and i resulted in this error: The Simulator can't be launched because it is already in use.
The frustrating thing about this was that on some days it happened no matter if my simulator was open (in which case the error made sense) or if I had recently closed the simulator (less sense). Sometimes the error was thrown if the simulator hadn't been run since the day before.
Steps that I frequently took:
1. Quit simulator
2. Quit and restart XCode
3. Run project (npm start or yarn start depending).
4. Start the simulator
Occasionally, development was less buggy if I simply started the simulator before running Expo.
There are dozens of ways to style components in modern applications. Styled Components and Style Props are two very common component-based approaches, though I'm not endorsing either as the best practice of either ecosystem.
React and Styled Components
Styled Components uses tagged template literals to style React components directly. You can adapt the tagged template literals based on props, by passing in "interpolations". Styled Components can also be used in React Native, which you can explore further here: https://styled-components.com/docs/basics#react-native.
React Native and Style Props/StyleSheet
The default solution for styling in React Native is the style prop. Whereas React has classNames or css files, React Native has style objects that are passed directly to the style prop for inline styling and styleSheets for styling outside of JSX. Each component has its own style props:
Both of these approaches have drawbacks: bloated component files and lack of style re-usability, but they are important options to consider when getting started in React Native.
State management is the same in React and React Native! You can choose to use APIs provided by React or external state management libraries.
React's useState
With the introduction of Hooks in React 16.8, state can be managed within components utilizing the useState hook.
React's ContextAPI
In both React and React Native, data is passed top-down via props. If your app, for example, has three components: a grandparent, parent, and child, typically you must pass props from the grandparent to the parent and then to the child for the child to have access to the data the grandparent has. In this way, the parent has to pass props even if that component has no use for the data. Context enables developers to grab what data they want from the component tree, without having to pass props down manually, reducing clutter in components.
Redux
Redux or a variety of other state management libraries will work in both React and React Native. You'll have to be the judge of whether your app is complex enough to warrant the use of an external library, or whether React's built-in APIs will suffice!
What do you do when your component doesn't look the way you thought you told it to? What about when props aren't rendering the way you expected? Or if that modal isn't appearing when the user submits that form? Having a solid set of tools to debug your application is essential.
Debugging in React
Pesticide
Pesticide is a Chrome Extension I use religiously in my front-end role. It's extremely helpful for catching styling bugs and seeing that extra div you didn't know existed, the one preventing your flexbox rules from working as expected ;)
Chrome DevTools
Chrome DevTools is a powerful set of web development tools that provide insight into the DOM, CSS, JS, etc.
React DevTools
React DevTools is a Chrome DevTools extension that allows you to visualize and edit state and props along the component tree of your app.
Redux DevTools
If you're using Redux for state management, Redux DevTools is an additional Chrome DevTools extension for debugging your application's state changes.
Debugging in React Native
Debugging in React Native is a significant departure from debugging React web applications.
In-app Developer Menu
- Reload
This error came randomly one day when I pulled down master after a colleague merged in a pull request. There didn't seem to be a real trigger for this error, and it was often solved with this pattern:
1. Quit the server (control c)
2. Restart Expo (expo start or yarn start or npm start)
If that didn't work, I'd try:
1. Hardware -> Shake Gesture to get to the in-app Developer Menu -> Reload or Reload JS Bundle only
- Enable Hot Reloading
- Toggle Inspector to inspect any UI element on the screen and its properties
"Debug JS Remotely" is also an option in the in-app Developer Menu, which accesses Chrome DevTools. However, I found myself disappointed that it can’t debug the styles and edit the style properties.
Stand-alone React DevTools
Instead of using the Chrome DevTools extension to debug React state and props, you'll need to get the desktop React DevTools app via yarn or npm. Here, in addition to debugging React components, you'll be able to debug styles.
Stand-alone Redux DevTools
If you're utilizing Redux for state management, React Native Debugger is a desktop app for debugging Redux and has an interface for React DevTools as well.
The libraries below for handling navigation are only some of the many options we have as developers.
React and React Router
I often use React Router in my React projects. It's a routing library for emulating multiple pages in a single-page-web apps without page refresh. React Router is made up of 'routers', 'route matchers', and 'route changers'.
An example App.js with React Router:
import React from 'react'
import { BrowserRouter, Switch, Route } from 'react-router-dom'

import LogIn from './components/LogIn'
import Profile from './components/Profile'


function App() {
return (
  <BrowserRouter>
      <Switch>
        <Route exact path={'/login'} component={LogIn} />
        <Route exact path={'/profile'} component={Profile} />
      </Switch>
  </BrowserRouter>
)
}

export default App
As I discovered when researching for this guide, React Router is also available for React Native!
React Native and React Navigation
The React Navigation library is the official React Native routing solution. The primary types of navigation offered are switch, stack, and tab.
Switch Navigation
With switch navigation, users can navigate between screens, but only one screen can be loaded at a time. Back functionality is not provided by default.
import { createSwitchNavigator } from '@react-navigation/switch';

import LogIn from './components/LogIn';
import Profile from './components/Profile';

const Switch = createSwitchNavigator();

function MySwitch() {
return (
  <Switch.Navigator>
    <Switch.Screen name="LogIn" component={LogIn} />
    <Switch.Screen name="Profile" component={Profile} />
  </Switch.Navigator>
);
}
Stack Navigation
With stack navigation, screens are rendered and placed on top of the other as a stack. Back functionality is provided by default.
import { createStackNavigator } from '@react-navigation/stack';

import LogIn from './components/LogIn';
import Profile from './components/Profile';

const Stack = createStackNavigator();

function MyStack() {
return (
  <Stack.Navigator>
    <Stack.Screen name="LogIn" component={LogIn} />
    <Stack.Screen name="Profile" component={Profile} />
  </Stack.Navigator>
);
}
Tab Navigation
With tab navigation, users switch between screens with a tab, often at the bottom of the viewport. Tabs can be links to new screens or another set of screens such as the stackNavigator. Read more about React Navigation's tab-based navigation here.
import { createBottomTabNavigator } from '@react-navigation/bottom-tabs';

import LogIn from './components/LogIn';
import Profile from './components/Profile';

const Tab = createBottomTabNavigator();

function MyTabs() {
return (
  <Tab.Navigator>
    <Tab.Screen name="LogIn" component={LogIn} />
    <Tab.Screen name="Profile" component={Profile} />
  </Tab.Navigator>
);
}
I hope this guide was able to provide the answers to some of your React Native questions. If not, please follow the links provided to read more in-depth documentation for each of the tools discussed here!
Additionally, if this post excites you about what's happening at Savas Labs, consider joining our team!