Lightning Talks - Three Useful Additions to Any Developer Toolbox in Q1 2017

Headshot of Ro Wang with building backdrop

Ro Wang —

Q1 2017 Lightning Talks

This post is part of a new series called “Lightning Talks.”

The web development world evolves quickly, and keeping abreast of new tools and methodologies while simultaneously delivering client work is tough.

One of our core philosophies at Savas Labs is to “hold ourselves to a high and constantly improving standard.” To that end, we dedicate time each month to share new tips and tools with each other to continue increasing our collective knowledge base – we call these our ⚡️“Lightning Skillshares!”⚡️

Since we believe in the open source ethos and sharing with the community, in this series, we’ll highlight some tips we use to improve our day-to-day efficiency (and hopefully yours too!).

What we’ve added to our toolboxes in Q1 2017:

1. Using Teleconsole for collaboration

2. Accessing a Dockerized database via PhpStorm or PhpMyAdmin

3. Using Apowersoft’s Free Online Screen Recorder to capture your screen

1. Using Teleconsole for collaboration

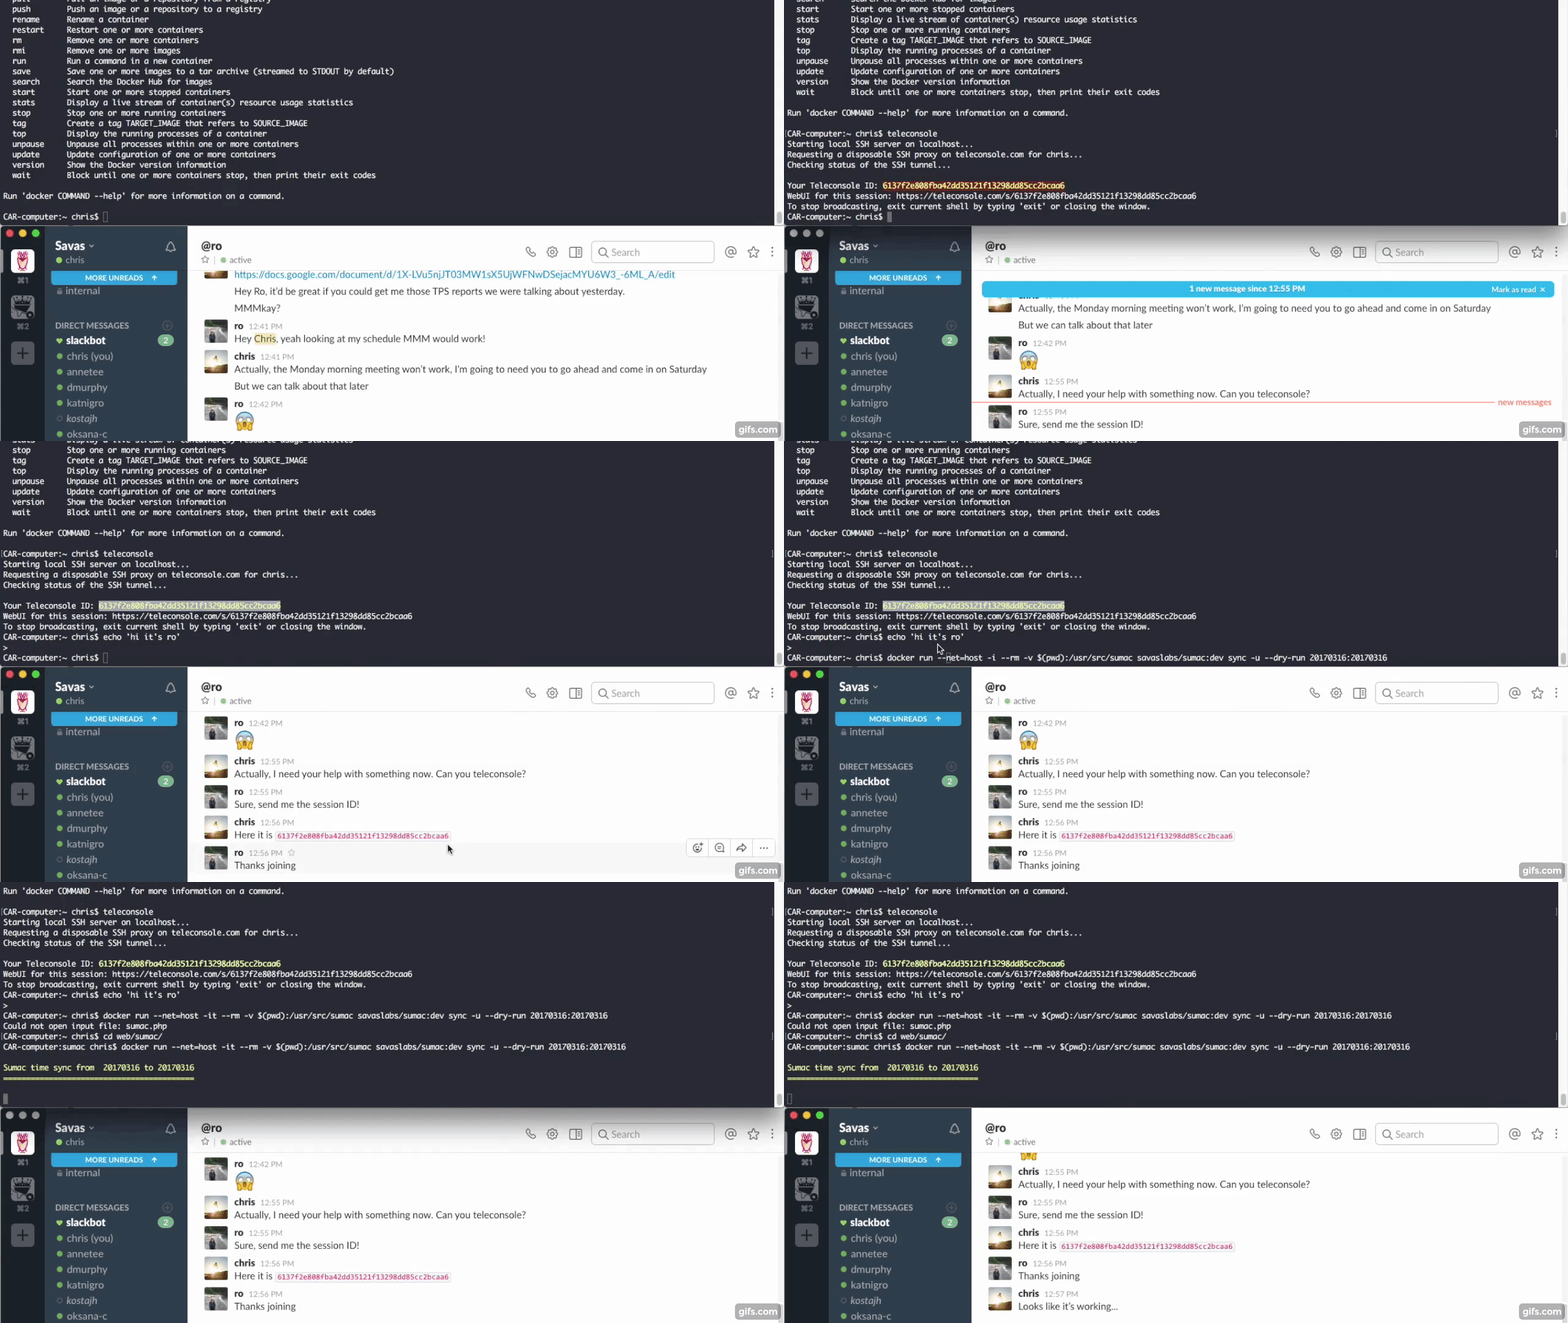
Teleconsole lets you share your UNIX terminal session for easy collaboration! We’ve been using it for a couple months now and find it to be an excellent addition to our team toolbox.

It works by starting an SSH server on the host computer and generating a unique session ID that others can connect to via their terminal or a web browser. You can have multiple connected individuals in a session, though we typically use it more for 1-1 debugging and troubleshooting.

Be aware, collaborators will have direct access to your terminal, so only share with people you trust and be careful about accidental commands. Other than that, it’s free and easy to set up – check it out here.

Teleconsole demo

2. Accessing a Dockerized database via PhpMyAdmin or PhpStorm

There are many useful tools available for interacting with a MySQL database. Since we’ve transitioned to Docker for our local development, we prefer one of the following techniques for manipulating databases abstracted into the Docker container.

Adding PhpMyAdmin to a Docker Stack

PhpMyAdmin is a great tool that provides a useful interface for visualizing and interacting with a MySQL database. Here’s a simple method for adding the PhpMyAdmin service to a project’s existing Docker Stack.

To build a container to run the PhpMyAdmin service:

  1. Simply add this snippet to your docker-compose.yml file
    • It uses the official phpmyadmin image and defines the host as the database container (mariadb in this example), so be sure to add it after the section defining your database container.
PHP myadmin container
  1. Set the correct database user and password (PMA_USER and PMA_PASSWORD).

Once the containers are up you can visit the port specific url (for instance <example.site>:8001) to access your project-specific PhpMyAdmin interface! ?

Using PhpStorm to interact with a Dockerized Database

Another method is to connect PhpStorm directly to the database container using PhpStorm’s Database Browser. Instead of opening a shell into the container via the command line, this allows us to view DB tables and run SQL queries directly within the PhpStorm interface! PhpStorm even provides useful code completions when writing database queries!

To connect PhpStorm to your DB container:

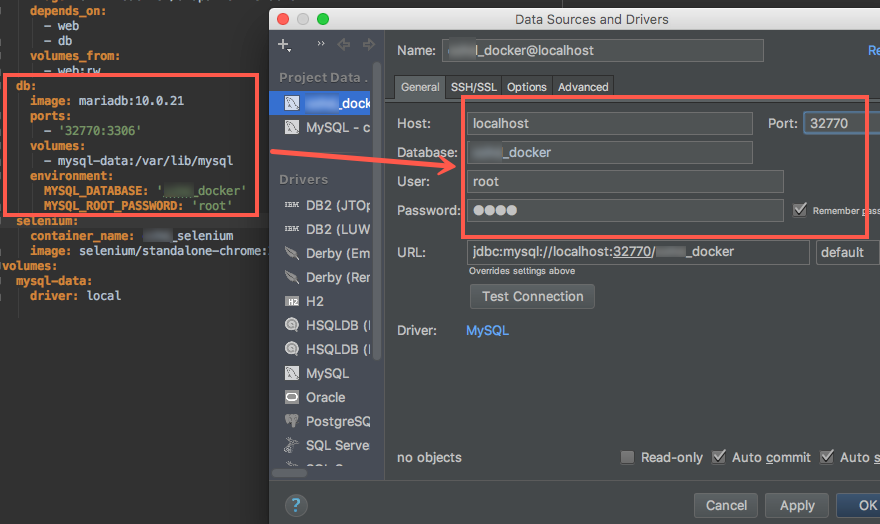
  1. In PhpStorm, go to the “Database Browser”, click the + dropdown and select “Data Source > MySQL”phpstorm connect 1
  2. In the popup window:
  • Map the project DB container’s port specified in the docker-compose.yml file to Port (in the below example it’s 32770)
  • Add the Database, User, and Password fields from the docker-compose.yml file as well
  • You can select Test Connection or just OK
pstorm connect2

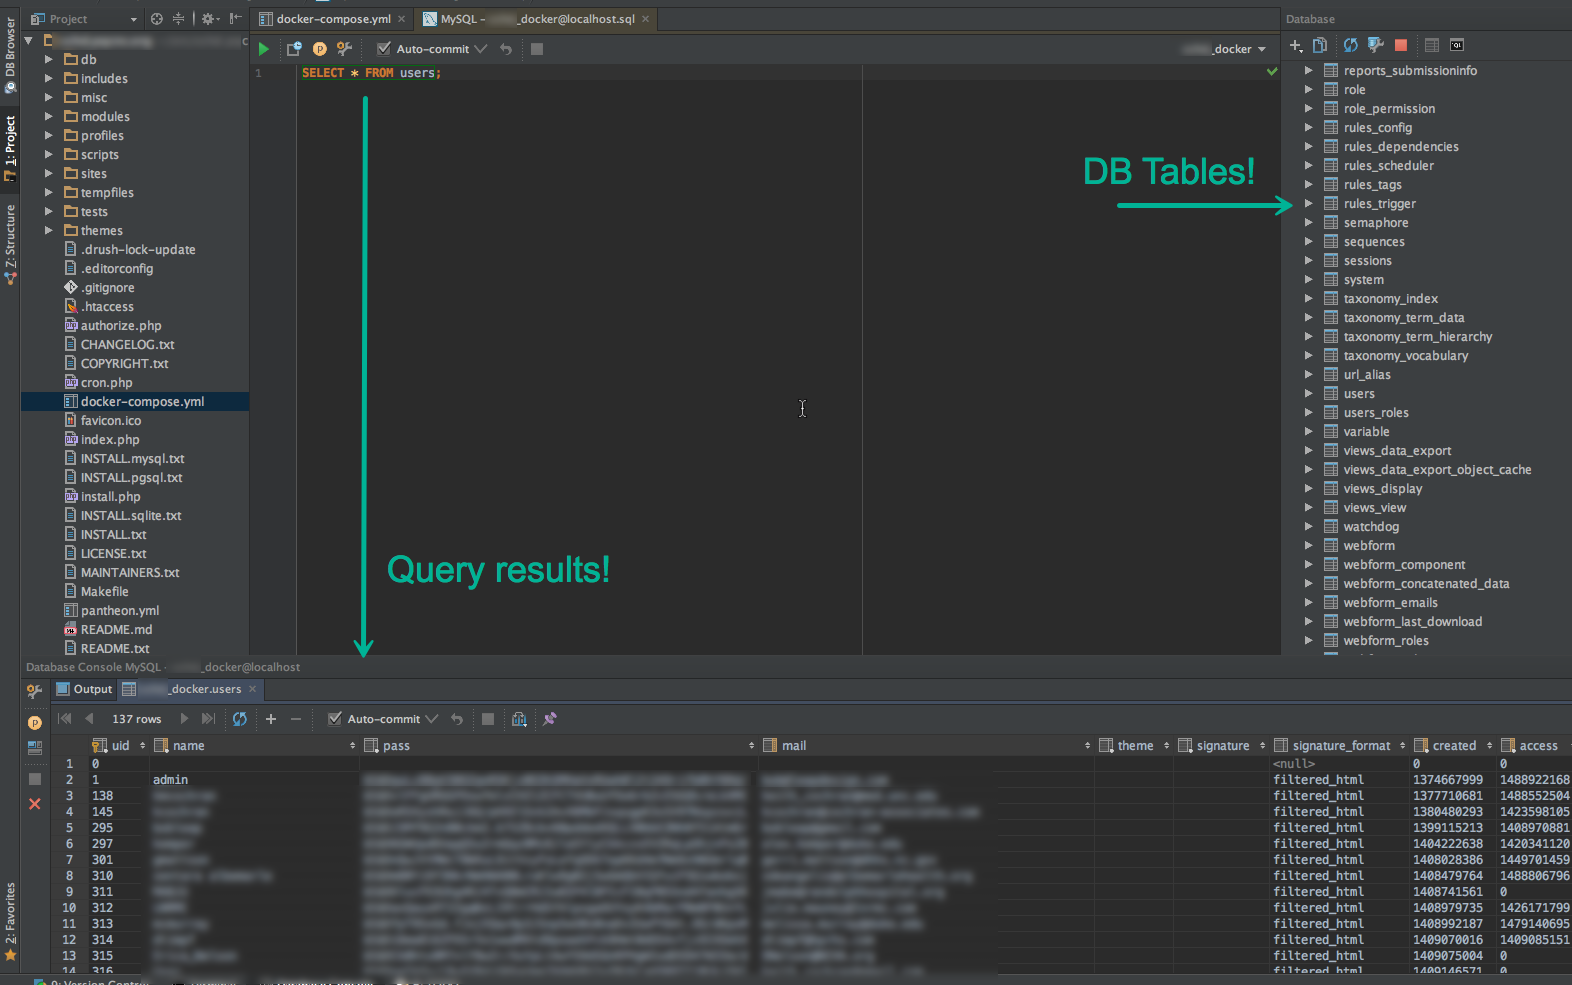
Once connected, PhpStorm will display all the tables in a drop down in the Database Browser, which is useful for quickly glancing through all the tables! You’ll also be able to run SQL queries within PhpStorm and see outputted results without having to leave the interface! ⭐️

pstorm connect3
Write and save custom queries!

3. Using Apowersoft’s Free Screen Recorder to capture your screen

If a picture’s worth a thousand words, than a video is worth…a million? There are times when it’s useful to send a short video (for example, a quick tutorial to a client) and Apowersoft’s Free Online Screen Recorder is a great tool for capturing your screen. It’s easy to use and there’s no recording time limit! Other things we like are the ability to customize the cursor appearance, limit the capture to a specific region of your screen, and specify the resulting video format.

Setup is incredibly easy:

  • Go to the site and download the Launcher (you only have to do this once)
  • Now anytime you want to record, just go back to the page and hit “Start Recording”!

*There is a Desktop version for those who prefer using the full application. However, the free desktop version limits recordings to 3 minutes.

Wrap Up

We hope you find this quarter’s top picks helpful!